Introduction
If Instagram feels sluggish, Reels stutter, or your iPhone storage keeps yelling about “Instagram – Documents & Data,” your cache is likely overflowing. The good news: you can reclaim 500MB–2GB (sometimes more) and make the app feel new again—in about two minutes. This guide shows you the fastest, most reliable ways to clear Instagram’s cache on iPhone without losing the stuff that actually matters.
What You’ll Learn
- The quickest method to clear Instagram cache and instantly free up space
- Step-by-step instructions (with clear, screenshot-style prompts you can follow)
- What clears vs. what stays when you remove cache
- Alternatives & troubleshooting if things still feel slow afterward
Why Clear Instagram Cache on iPhone?
What is cache?
Instagram saves temporary files (images, videos, thumbnails, in-app browser data, preloaded Reels) so content loads faster. Over time, these files balloon.
Signs you should clear it
- App feels laggy or freezes on Reels/Stories
- Images load blurry, then “pop in” slowly
- Search suggestions feel stale
- iPhone Storage shows Instagram using a large “Documents & Data” footprint
- Draft Reels/Stories fail to upload or crash the app
Benefits
- Storage back: hundreds of MBs to multiple GB
- Performance boost: smoother scrolling, faster media loads
- Fewer glitches: clears odd UI bugs and stale suggestions
Method 1: Offload App (Recommended)
Why this method?
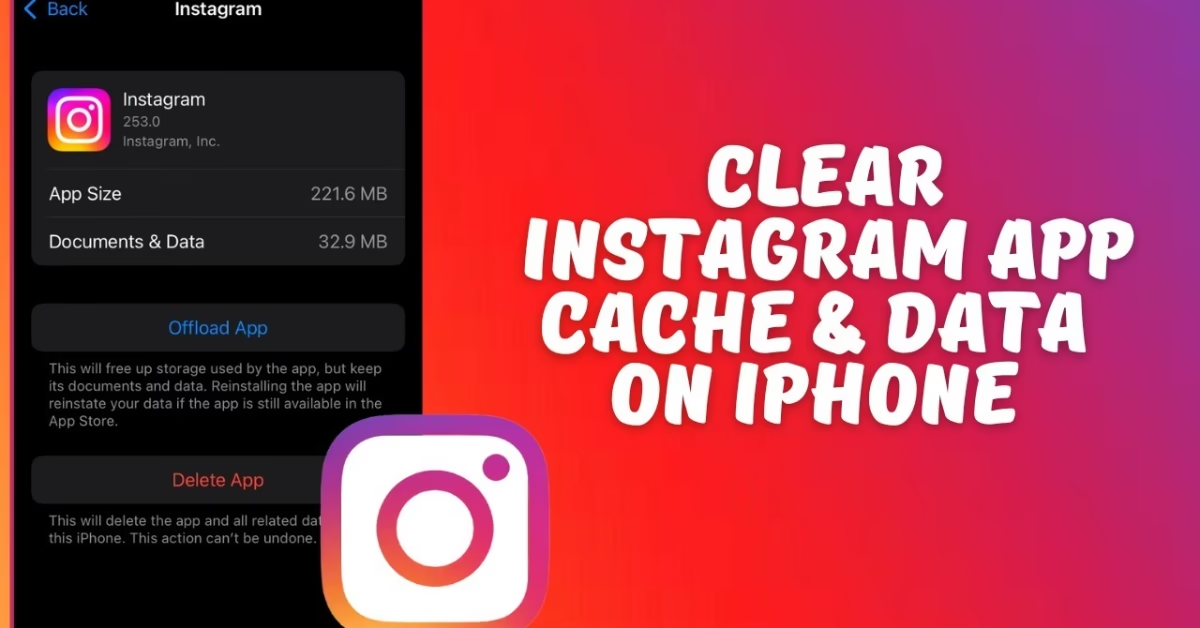
Offloading removes the Instagram app from your iPhone but keeps its documents and data tied to your Apple ID, so your login and settings usually restore on reinstall. In practice, Instagram’s bulky cached media is purged, and you don’t lose your account content stored on Instagram’s servers.
Steps (≈2 minutes):
- Open Settings → General → iPhone Storage.
- Scroll and tap Instagram.
- Tap Offload App → confirm.
- Tap Reinstall App (from the same screen) or find Instagram on your Home Screen and tap to reinstall.
What you’ll notice after:
- “Documents & Data” drops significantly.
- Instagram re-downloads only what you actually view, keeping things lean.
- You should remain signed in; if not, simply log back in.
Method 2: Delete and Reinstall (Deep Clean)
Why use this?
If offloading didn’t reclaim enough space or the app remains buggy, a full delete is the most thorough reset of cache and local data.
Steps:
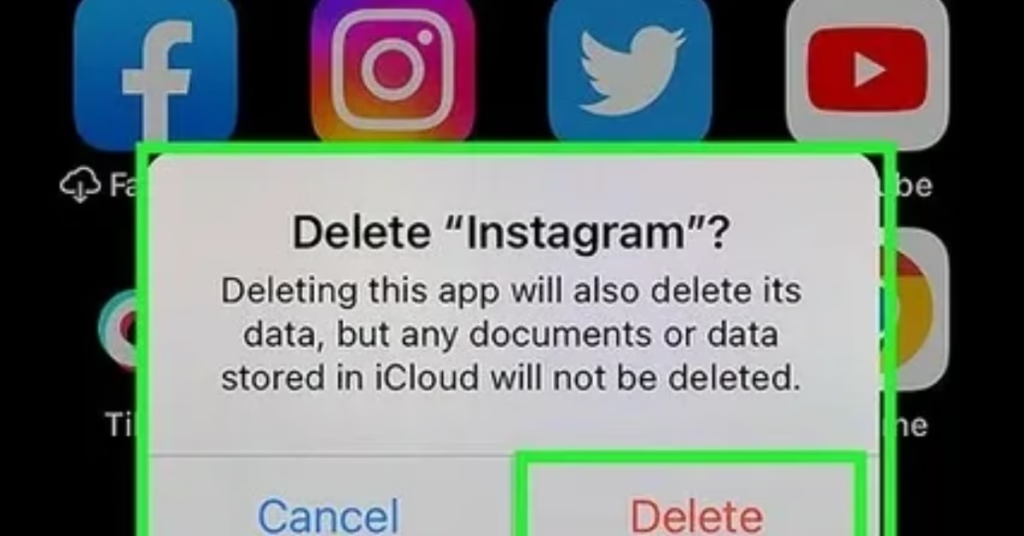
- Long-press the Instagram app icon → Remove App → Delete App → confirm.
(Or: Settings → General → iPhone Storage → Instagram → Delete App.) - Open the App Store, search Instagram, and reinstall.
- Log in to your account.

Pros
- Most complete purge of cached files and local cruft
- Fixes stubborn glitches, failed uploads, corrupt drafts
Cons
- You’ll need to sign in again
- Local-only drafts (Reels/Story drafts saved on device) are usually lost
- Some in-app preferences/notification settings may reset
Tip: Before deleting, save important drafts to your Camera Roll (export/download) or publish to drafts saved in the cloud (if available) to avoid losing them.
What Happens to Your Data When Clearing Instagram Cache?
Kept (server-side, safe to clear cache):
- Your account, followers, posts, Reels, Stories, messages (DMs), comments, likes
- Cloud-based settings and data tied to your Instagram account
Usually reset/removed (local, cache-level):
- Temporary media files (thumbnails, preloaded Reels/Stories)
- In-app browser cache, stale search suggestions
- Potentially local drafts and edits not saved/exported
- Some notification toggles and minor preferences may revert
Bottom line: Clearing cache does not delete your Instagram account or published content. It mostly purges temporary, space-hogging files.
Additional Tips to Optimize Instagram Storage
Inside Instagram
- Clear recent searches: Profile → ☰ (menu) → Your activity → Recent searches → Clear all.
- Limit high-quality preloads: Profile → ☰ → Settings & privacy → Data usage & media quality
- Turn Data Saver on (reduces preloading).
- Disable Upload at highest quality unless you need it every time.
- Turn Data Saver on (reduces preloading).
- Manage downloads/archives: Avoid auto-saving posted stories/reels to Camera Roll if space is tight.
On iPhone (system-level)
- Settings → General → iPhone Storage: Review Recommendations (e.g., Offload Unused Apps).
- Photos → Optimize iPhone Storage: Keeps full-res in iCloud, lighter versions on device.
- Messages: Settings → Messages → Keep Messages (set to 1 Year or 30 Days) and Review Large Attachments.
- Safari cache: Settings → Safari → Clear History and Website Data (if you browse heavily).
- Keep at least 5–10% free space for best overall performance.

Conclusion
For most users, Offload App is the fastest and safest way to clear Instagram cache and reclaim serious space. If issues persist, Delete & Reinstall delivers a deeper clean. Combine that with smarter data usage settings and iPhone storage hygiene, and Instagram will stay smooth—without gobbling your gigabytes. For more tech tips and app reviews, check out Fletchapp.com to stay ahead in the world of technology!
Follow us on Instagram and Twitter/X!
FAQ’s
Q1. Will clearing the cache delete my photos, posts, or DMs?
No. Those live on Instagram’s servers. You won’t lose published content or messages.
Q2. What about drafts?
Drafts are often stored locally. Deleting the app can remove them. Export important drafts to your Camera Roll first.
Q3. Do I have to log in again after offloading?
Usually no—offloading often preserves app state. If you’re logged out after reinstall, just sign back in.
Q4. How much space will I get back?
Heavy users commonly reclaim 500MB–2GB+. Your mileage varies based on how much Reels/Stories you watch.
Q5. How often should I clear it?
When the app feels laggy or iPhone Storage shows Instagram swelling again. For heavy Reels viewers, once every 1–3 months works well.
Q6. Is there an in-app “clear cache” button on iPhone?
No. Unlike Android, iOS relies on Offload App or Delete App to purge cache effectively.
Q7. The app is still slow after clearing. Now what?
Update Instagram, restart your iPhone, ensure you have free storage (5–10%), and check Data Saver settings. If issues persist, delete/reinstall and test on Wi-Fi vs. cellular.
Q8. Will notifications and settings reset?
Some preferences might. After reinstall, quickly recheck notification and media-quality settings.


